
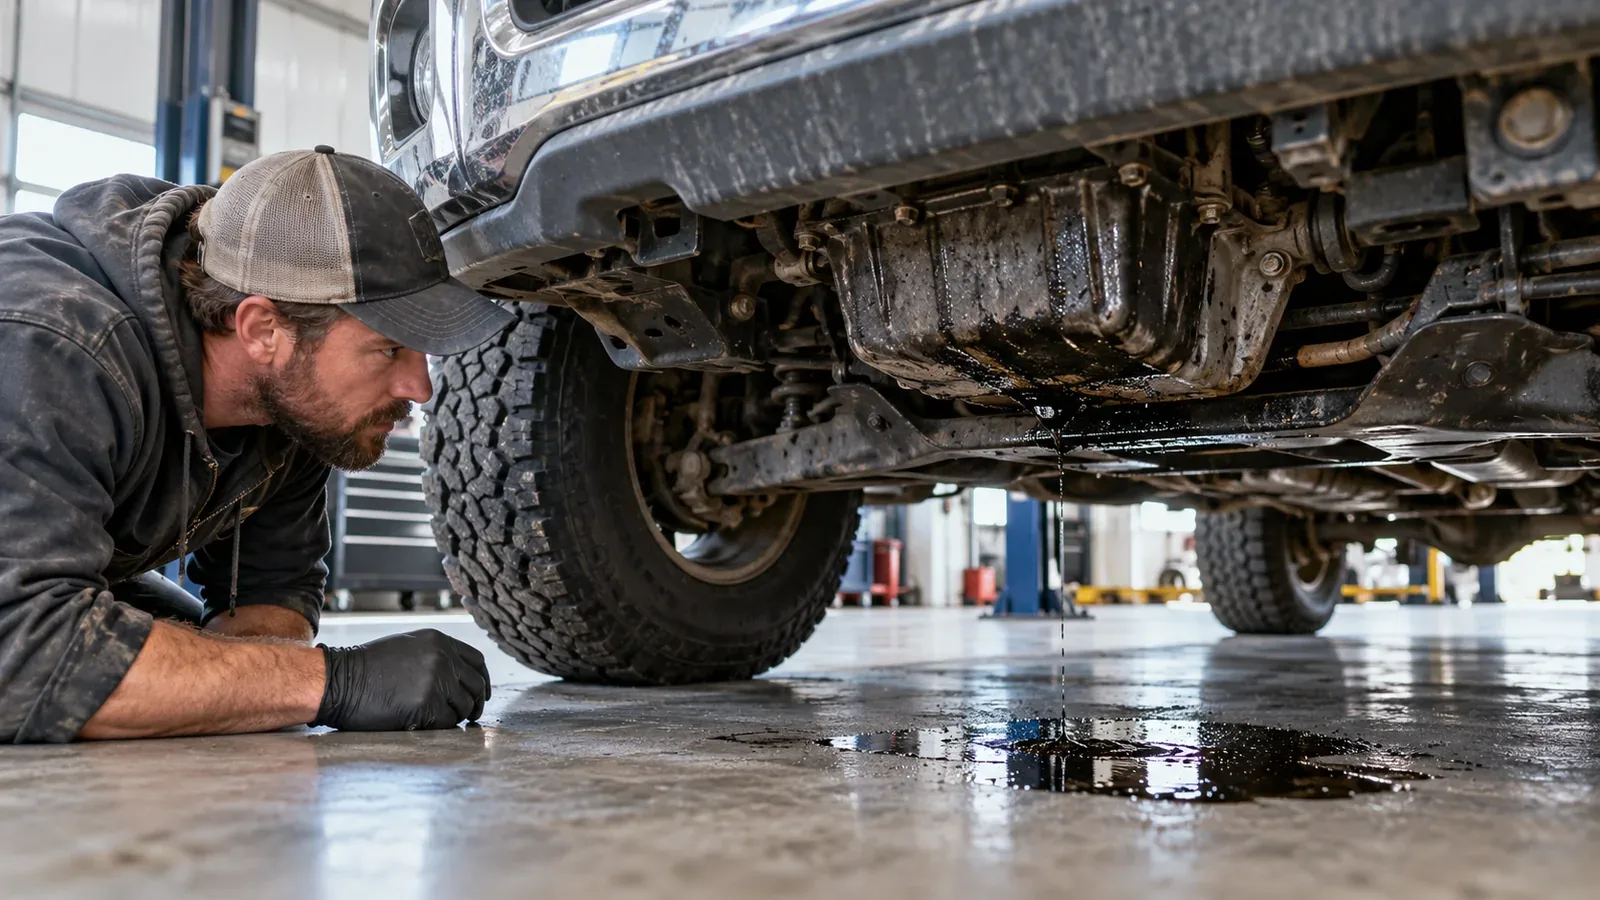
You park your truck after work and notice a dark spot below the engine. It could be a few drops left from an oil change, a gasket that has started to seep, or a pressurized leak that needs immediate attention. The puddle is real, but the diagnosis is not obvious from where it lands. Wind, moving components, underbody panels and gravity can carry fluid away from its source.
A truck leaking oil needs two decisions, in order: is it safe to leave the engine off or move the vehicle, and where is the fluid actually coming from? This guide helps with both without turning a stain on the driveway into an automatic oil-pan, turbocharger or rear-main-seal replacement. It is written primarily for U.S. gasoline and light-duty diesel pickups, with notes for vocational trucks and larger diesels. Follow your exact owner’s manual and any dashboard warnings over a generic checklist.
Stop-driving warning: If the low-engine-oil-pressure light comes on while the engine is running, the oil level is dangerously low, oil is flowing onto the ground, the engine knocks, or there is smoke or a burning-oil smell from a hot surface, stop safely, switch off the engine and arrange professional help. A normal dipstick reading does not cancel a low-oil-pressure warning. Do not restart the truck repeatedly to locate a major leak.
Quick answer: why is my truck leaking oil?
Oil may escape from a filter or drain plug after service; from a valve or rocker cover gasket high on the engine; from an oil pan, seal, line or housing lower down; or from components such as a turbocharger oil feed or return system on an equipped diesel. Residue may also be left from a previous repair rather than an active leak. The location of the drip, its timing and whether the oil level is changing help narrow the possibilities, but only an inspection that traces the highest wet point or reproduces the leak can confirm a repair. Start with safe observations, not a parts order.
First separate five situations
| What you notice | Why it matters | Sensible next step |
|---|---|---|
| One or two old-looking stains after a recent oil change | Residual spilled oil is possible, but a loose filter or plug must not be assumed harmless | Check level following the manual; contact the servicing shop for a prompt inspection |
| Fresh spots return after each drive | A live leak is more likely, even if nothing drips while the engine is cold | Record size, time, location and level; have the source traced |
| Oil appears only after towing or highway driving | Heat, RPM, airflow and pressure can alter how a leak presents | Note load and duration; avoid a high-load test just to recreate the failure |
| Fluid spreads across a skid plate or crossmember | The drip location may be far from the failed seal | Request cleaning, inspection and source confirmation rather than a guess from the puddle |
| Oil pressure warning, rapid loss, smoke or serious noise | Lubrication or fire risk may be immediate | Stop safely, switch off, and arrange recovery |
A slow-looking drip can still be consequential, especially when engine oil lands on exhaust components or near electrical equipment. Conversely, a dark mark on the ground could come from a different component. Do not treat this table as permission to keep driving if there is uncertainty about safe operation.
What to do when you find oil under your truck
1. Park safely and leave the engine off while you assess. Set the parking brake and choose level, solid ground away from traffic. If the truck has a severe warning or substantial leak, do not drive it around the block to gather more evidence. A busy roadside or a hot engine bay is not a suitable place for an experiment.
2. Photograph the stain before cleaning it. Include something for scale, such as a ruler placed next to—not in—the fluid. Record whether the stain is wet, spreading or a dry old mark. Take a wider photo showing where the truck was parked. The tire and bumper positions help the shop map the stain to the vehicle.
3. Check the engine-oil level only according to the vehicle manual. A common pickup method is to park level, allow time for oil to drain into the sump, remove and wipe the dipstick, reinsert it completely and read it again. But the wait time and procedure vary. A Ford F-150 instruction, for example, specifies checking before startup or after a defined wait following engine shutdown. Some engines use an electronic level display instead of an accessible dipstick. Never reach past hot, moving or energized parts.
4. Do not overfill to compensate for uncertainty. A low reading can call for the specified oil and measured addition following the manual, but adding above the maximum mark can also damage the engine. If the level is unexpectedly low, the rate of loss is unknown, or an urgent warning appeared, arrange an inspection or towing rather than treating topping up as a repair.
5. Look from outside the vehicle, not from beneath an unsupported truck. Visible wetness around an accessible oil fill cap or filter housing may be useful. Do not remove undertrays on an unstable vehicle, put your body under a truck supported only by a jack, touch hot exhaust equipment or run the engine while reaching into the engine compartment.
6. Save the service timeline. Note the last oil change, mileage, filter service, collision or impact, turbo work, gasket replacement, and any new warning. A technician deciding whether oil is fresh, migrated or residual needs that history.
7. Ask the workshop to identify the leak’s origin. A quotation naming “rear main seal” based solely on where a drip falls is not a proven diagnosis. Ask whether the engine was inspected clean and whether the highest new wet point was identified.
Oil level and oil pressure are different
A dipstick primarily measures the amount of oil in the sump at the time of the reading. It does not measure circulation pressure in the running engine. A low-oil-pressure message may reflect insufficient lubrication pressure even when the measured level is not low. Ford’s owner instructions explicitly tell drivers to stop safely and shut off the engine when this warning appears. Do not restart because the dipstick looks normal. A technician may need to verify the sender or pressure with appropriate equipment; the driver should not guess which it is.
An “oil change required” or “oil life” notice is a different maintenance reminder, not proof of a current leak or a low-pressure condition. Read the exact dashboard wording and take a photo once stopped safely.
Is the puddle really engine oil?
Fluids can be misidentified by color alone, especially on vehicles with high mileage, road grime or previous fluid changes. Engine oil often looks amber to dark brown or black and feels slippery; transmission, axle, steering and hydraulic fluids can look similar when dirty. Coolant can be colored, and ordinary water dripping after air-conditioning use can be harmless condensation. Brake-fluid leaks are a serious braking concern, not an ordinary engine-oil problem.
Do not taste, deliberately smell closely or rub an unknown fluid on skin to identify it. Keep children and pets away from the stain. Photograph it, use an absorbent pad if it can be done safely, and have a professional confirm the fluid. The FTC and AAA both describe fluid appearance as a clue, not a substitute for identifying the system that is losing fluid.
| Fluid or symptom | Common clue, not a test | Why a shop must verify |
|---|---|---|
| Engine oil | Brown/black oily mark, sometimes near the engine | Can travel along underbody shields and crossmembers |
| Transmission fluid | May be red, amber or brown depending on condition | Front and mid-vehicle stains can overlap engine-oil drip areas |
| Differential/axle lubricant | Thick lubricant near axle or driveline area | Color alone does not identify it; repair can be safety-critical |
| Coolant | Colored or clear depending on formulation; often watery | An oil-cooler issue can even involve more than one system |
| A/C condensate | Usually clear water after cooling the cabin | Should not be assumed if oily residue or warning signs are present |
| Brake or hydraulic fluid | Fluid near line/wheel/hydraulic component | Treat changes in braking or steering as urgent |
Why the location of the spot misleads
The engine and chassis are not flat surfaces. Oil escaping from a valve-cover gasket may run downward around brackets and the bellhousing. A splash guard can hold it until the truck stops, then release it in one apparent puddle. Airflow can carry residue backward under the truck. Detroit Diesel’s published service procedure tells technicians to look for the highest point of the oil trace, not simply repair the component directly above the stain. That principle applies broadly, although its exact component checks are engine-specific.
An owner can make a simple parking-position sketch; the actual leak tracing belongs in a safe shop environment.
Where engine oil leaks commonly start
The following are possible locations, not a ranking of probabilities for your truck. Every engine family has its own seal layout and common failure points, and the same symptom can come from different components.
1. Oil filter, filter housing or drain plug
A new stain soon after an oil change makes the serviced areas important to inspect. The filter seal, housing, drain plug, seal washer or residual spilled oil may be involved. Some engines use a cartridge filter housing; others a spin-on filter. The correct verification is a visual inspection and a check for fresh fluid after the affected area is cleaned, following the service procedure. Do not tighten a hot filter or drain plug blindly. Improper torque or a damaged sealing surface can make things worse.
A shop should be able to tell you whether it found active dripping, an incorrectly seated seal, old spilled oil or an unrelated leak. A previous oil change is a useful clue, but timing alone is not proof that the shop caused the problem.
2. Valve-cover or rocker-cover gasket
Oil may escape higher on the engine and run down a cylinder head or block. Because it migrates, a leak at the top can appear to originate at the oil pan. On some engines, oil from a cover area can reach hot exhaust components, creating an acrid smell or smoke. A technician should inspect the upper perimeter, nearby breathers and any oil filler area, rather than replacing the lowest wet gasket first.
A thin film of old dirt trapped in oil is different from a fresh wet trail. Photographs after cleaning or a manufacturer-approved test can help distinguish the two.
3. Oil pan, drain area or damaged lower casing
A dented pan following a road impact, damaged sealing surface, compromised gasket or incorrectly serviced drain plug can release oil near the bottom of the engine. But oil collecting on the outside of a pan can also have flowed down from much higher. A quotation for pan removal should explain why the pan itself has been proved to leak.
Ask whether an underbody impact, loose fastener, damaged pan or previous repair is documented. If a major breach is suspected, do not start the engine to “see how fast it leaks.”
4. Front or rear crankshaft sealing areas
Seals near the crankshaft can leak, sometimes presenting as oil at the front cover area or bellhousing. However, oil running down from a valve cover, oil filter housing or other upper engine component can end up at the same location. Because replacing a rear crankshaft seal may require substantial labor on some drivetrains, source identification matters before a gearbox or transmission is removed.
A technician should make the distinction using the vehicle-specific procedure and observations. “Oil near the transmission” does not automatically mean “rear main seal.”
5. Oil cooler, lines, adapter and sensors
Some trucks have oil cooler assemblies, external lines or seals at oil filter adapters and sensor housings. These are potential leakage points that can be hard to see from outside. A damaged oil supply line under pressure can lose oil rapidly. Ask the workshop to inspect the exact hose connections and housings appropriate to your engine, and to consider adjacent fluid systems if the stain is ambiguous.
Do not try to tighten a suspected pressurized fitting or trace a leak with fingers while the engine is running.
6. Turbocharger oil feed and return on equipped engines
Turbocharged gasoline and diesel engines route lubricating oil to the turbocharger. Depending on design, external supply and return joints, seals or fittings can seep or leak. Oil in intake plumbing is not by itself proof of a failed turbocharger: service procedures distinguish minor residue from a confirmed loss of oil. High crankcase pressure can also affect leakage patterns. Ask for a diagnosis of the full oil circuit rather than automatically ordering a turbo.
On larger diesel trucks, component access, oil system layouts and inspection procedures differ substantially from light pickups. Detroit Diesel publishes a detailed diagnostic sequence for certain DD-family engines, but it should not be used as a universal repair instruction for an F-150, Ram or Silverado.
7. Crankcase ventilation and excessive internal pressure
A blocked or faulty crankcase ventilation path can contribute to abnormal pressure and push oil past weak seals, depending on engine design. That does not mean every engine with oily residue needs a new PCV valve or breather. When several joints seem to leak, or a repair fails repeatedly, it is reasonable to ask the shop whether crankcase ventilation has been assessed according to the manufacturer’s procedure.
8. Old spilled oil or a misidentified source
A technician may find no active engine-oil leak because oil left during a service was never cleaned away, because a different fluid is leaking, or because a previous repair fixed the problem. If the level remains stable and fresh wetness cannot be reproduced, record the observation and agree on a monitoring plan rather than authorizing major work without evidence. That is not an invitation to ignore a persistent smell, fresh puddles or warning lamps.
Why a truck leaks oil only after driving
This is one of the most useful details to put on a repair order. An engine that sits cold overnight may not drip in the same way it does after several miles: metal temperature, oil movement, crankcase pressure and airflow all change during operation. An underbody shield may collect fluid while driving and release it only when parked. Warm oil can also reach surfaces where it smells or smokes.
Write down whether the stain appeared after city driving, a highway trip, a long idle or towing. Do not assume a particular gasket expands or contracts a predictable amount on every engine; those effects are design-dependent. It is the repeatable pattern, not a speculative mechanical explanation, that helps the technician choose a safe test.
Only when parked, not while running?
The puddle may be delayed drainage from a running leak, not proof that the truck leaks only when switched off. Oil can move down into a low point over several minutes. Take a photo immediately after parking and another later, without getting under the vehicle. The difference helps the shop reproduce conditions.
Only while towing or carrying a heavy load?
A load-related leak warrants prompt attention because operating conditions may be more demanding and the consequences of loss can be larger. Note trailer weight if known, route, speed, temperature warnings and the oil level trend. Do not pull a loaded trailer specifically to reproduce a leak. If the engine is losing oil rapidly, have it transported rather than driven.
A puddle appeared right after an oil change
This deserves a fast call to the service provider. A technician should check for a correctly installed filter, its seal, drain plug, any cap or filler issue, and excess oil spilled during the service. An inspection may find another issue unrelated to the work. Request a written explanation and a post-repair leak check; no need to begin by accusing anyone.
A safe observation checklist before calling the shop
A useful report can be prepared in five minutes without dismantling the vehicle:
- Vehicle: model, year, engine, approximate mileage, two-wheel or four-wheel drive if relevant.
- When: first noticed, last oil service, any recent work, whether the leak has become more frequent.
- Where: photo with tire position and ground reference; do not guess the part directly overhead.
- Amount: a few droplets, a fresh wet patch or an expanding puddle. No improvised leak-rate calculation is needed.
- Oil level: method used and approximate reading, if it can be checked safely and the manual permits it.
- Warning signs: exact dash message, smoke, odor, engine noise or any steering/braking problem.
- Use conditions: parked, after idle, highway, hill, towing or after heavy braking.
- Next decision: stop and recover, or request an inspection without driving the truck yourself.
Keep separate notes for what you observed and what the technician actually verified. Photograph the stain, record oil-level changes when checked according to the manual, and ask for the confirmed leak source in the written estimate. That prevents a suspected gasket from being treated as a diagnosis before inspection.
What a competent oil-leak diagnosis should establish
A shop should explain what is leaking, where it starts, and what evidence supports the proposed repair. Reasonable methods depend on access and the manufacturer; examples include careful visual inspection, cleaning and reinspection, appropriate lighting, and an approved tracing or dye procedure when needed. Not every leak requires dye or prolonged engine operation. The shop should follow vehicle-specific safety steps.
Ask these questions:
- Is the material confirmed as engine oil, rather than transmission, axle, steering or hydraulic fluid?
- Was the vehicle inspected for a fresh source at the highest wet point, not just a low drip?
- Was there a recent service that could explain spilled oil, loose sealing hardware or a new problem?
- What test or photo distinguishes a cover gasket, oil pan, filter housing, oil cooler line or crankshaft seal?
- Will the technician assess ventilation or crankcase pressure if the same leak keeps recurring?
- Is there any risk from oil reaching hot exhaust, belts or other components?
- What will be cleaned and checked after repair to demonstrate that new oil is no longer appearing?
- What happens if the originally quoted part is replaced but the leak persists?
A diagnosis that reads only “oil leak - replace gasket” is incomplete when multiple gasket locations are possible. The FTC advises obtaining a written estimate identifying the condition, parts and labor, and setting approval limits for additional work.
Oil-leak repair costs: how to compare quotes without false averages
There is no defensible single “truck oil leak repair cost” that applies across a compact pickup, a diesel dually and a heavy-duty tractor. Access labor and engine architecture can outweigh the price of the seal itself. A minor service correction and a seal requiring major driveline removal should not be grouped into one confident price range without current, local, vehicle-specific data.
Instead compare quotations using these rows:
| Quote item | What to request | Why it affects the decision |
|---|---|---|
| Diagnosis | Time, method, findings and photos | Confirms the part rather than guessing from a stain |
| Part and seal | Exact location and part description | Two “gasket jobs” can be very different repairs |
| Labor | Estimated hours and hourly rate | Access may require substantial disassembly |
| Fluids/consumables | Oil, filter, seals and disposal | Avoid surprises beyond the headline part |
| Related work | What is necessary now versus optional | Prevents unrelated work being bundled as urgent |
| Warranty/recheck | Parts/labor terms and verification | Establishes what happens if the same leak returns |
| Downtime | Days out of service, towing, schedule impact | For a work truck, downtime can exceed the parts bill |
Worked example: two hypothetical repair decisions
These are made-up arithmetic examples to show how to compare quotations. They are not current prices, shop estimates, or a prediction for any model.
A contractor receives Quote A: $180 diagnostic work + $240 confirmed filter-housing repair + $45 supplies = $465. Quote B proposes $1,350 for a larger seal job, but does not explain how the source was confirmed. The immediate saving from approving A instead of B would appear to be $885, but price alone does not prove A is correct. The rational sequence is to ask both shops for source evidence and the scope of their work, then compare verified repairs on equal terms.
In another fictional case, a truck used for deliveries could be off the road for two days with one repair versus half a day with another. If lost contribution (not total revenue) is assumed to be $220 per day, that difference adds $330 of lost contribution. It should be counted only if the work cannot be rescheduled and only once. This is a decision model, not a market cost estimate.
Why a tiny seal can create a big invoice
Parts cost is not the whole job. Some seals sit under easily accessible covers; others require removal of crossmembers, exhaust, driveline components or other assemblies. The same named part can have different access requirements across engines and chassis. A written estimate should show what needs to be removed and why. If the quoted repair is expensive or uncertain, a second opinion is reasonable before authorization unless immediate vehicle safety makes delay inappropriate.
Three practical scenarios (illustrative, not customer stories)
Case 1: fresh drops after a routine oil change
A pickup owner sees a small wet spot the morning after a service. The engine runs normally and there is no oil-pressure warning. The owner photographs the stain and follows the manual’s level-check procedure without crawling beneath the truck. The servicing shop finds old oil on a splash shield, cleans the area, inspects the serviced filter and drain plug, and verifies whether fresh oil reappears. In this example, it does not. Lesson: ask for confirmation of active leakage before buying a gasket repair; the absence of active leakage should still be documented rather than assumed.
Case 2: black spots and a burning smell after hill climbs
An older pickup begins leaving spots after trips with a trailer. The owner also notices an acrid smell after parking. There is no safe way to inspect the hot exhaust in the driveway, so the truck is not used again for towing before inspection. A technician traces fresh oil from a higher cover area rather than from the oil-pan seam where it first appeared. Lesson: the combination of oil migration, hot surfaces and load changes the urgency and can make a low-location guess wrong.
Case 3: large puddle and a low-oil-pressure warning
A diesel work truck develops a fresh puddle while stopped. After a warning appears, the driver shuts it down safely and arranges recovery. A qualified shop assesses a pressurized line or fitting using the engine-specific procedure and checks for contamination and any consequential damage. Lesson: a warning about lubrication pressure is not a “watch it for a week” problem. The decision about repair or engine damage comes after testing, not from the puddle alone.
None of these scenarios is presented as a real customer, verified failure rate or representative repair price. They show how the same phrase—“my truck leaks oil”—can require different next steps.
Oil leak versus oil consumption: why the level can drop without a puddle
A falling oil level is not definitive proof of an external leak. Oil can be consumed internally, escape under running conditions without collecting below the parking location, or be affected by inaccurate measurement procedures. Engine families have different published oil-consumption expectations and service criteria. Read the manual and keep comparable observations before declaring the engine defective.
If a truck needs frequent oil additions but leaves no visible spots, record miles, date, oil type, the exact level-check method, amount added and warning history. Ask the shop to investigate oil use, ventilation, external leakage under operating conditions and any manufacturer-specific service thresholds. Do not invent a universal quarts-per-1,000-miles rule.
For related symptoms, the guide to truck overheating addresses cooling-system warnings; the Check Engine Light guide explains diagnostic codes. Neither should replace direct oil-level or pressure assessment.
Can you drive with a small oil leak?
There is no universally safe number of miles, days or puddle diameter. A small old spot with a stable level and no warnings may be less urgent than active pouring or oil contacting a hot exhaust surface—but you cannot certify a vehicle as safe from a driveway photograph. Arrange inspection, monitor only according to professional and manufacturer advice, and be especially careful when the truck carries heavy loads or tows.
Do not continue driving if the low-oil-pressure warning stays on while the engine is running, the level is below safe specifications and cannot be corrected per the manual, the leak is rapid or substantial, the engine makes new severe noise, or oil is contacting hot components and smoking. If you suspect an engine fire, evacuate to a safe distance and contact emergency services. Towing is preferable to gambling on engine damage.
Does using stop-leak additive make sense?
Do not pour a generic chemical sealant into an engine simply because the repair quote is expensive. Compatibility and warranty considerations vary; Ford owner information advises against supplemental engine-oil additives for the cited engines. A product cannot correct a broken pressurized line, damaged casting, badly installed filter or unknown fluid source. Confirm the system and follow the manufacturer’s requirements before adding anything.
Can you inspect underneath yourself?
A vehicle can fall or move unexpectedly if incorrectly supported. A pickup or heavy truck requires appropriately rated equipment, level ground and trained procedures. This guide deliberately does not provide steps for lifting a vehicle or approaching a running engine from below. If the source cannot be seen from a safe external position, ask a shop to inspect it.
How to prevent repeat leaks without replacing parts preemptively
Follow the manufacturer’s oil-change interval and fluid specifications, including the correct filter and seals. Have the shop inspect any dampness discovered during service rather than buying every recommended gasket immediately. If a vehicle has a history of recurring leaks, the underlying installation quality, crankcase ventilation or fluid level may deserve investigation. Save invoices and post-repair checks so later technicians know exactly what was done.
For a business truck, make a simple policy: drivers photograph new fluid spots, stop for urgent dashboard warnings, and report changes promptly to maintenance. Track downtime and repair outcomes rather than counting a “fixed” leak until the recheck shows no new oil at the original source. This is more useful than a generic maintenance calendar that ignores actual symptoms.
Oil cleanup and environmental responsibility
Use appropriate absorbent material for small spots when it is safe, keep oil away from drains and waterways, and avoid washing spilled oil into the street. Used oil and contaminated materials should be handled in accordance with local rules. EPA advises collecting used motor oil in leak-proof containers and taking it to appropriate collection sites; do not mix it with antifreeze, solvents or other liquids. Commercial fleets may have additional used-oil handling obligations that are different from a homeowner’s small spill.
Do not dispose of oil or soaked absorbents in ordinary trash without checking the rules where you live. A shop should also manage filters, contaminated parts and waste fluids correctly.
Questions owners often ask
Why does my truck leak oil when parked?
Oil may continue to drain across engine surfaces or out of a shield after the engine stops. A fresh puddle can also come from an actively leaking seal, filter, line or pan. A parking stain alone does not identify the origin. Photograph where it appears and have a technician trace the highest new wet point.
Why is there oil under my truck after an oil change?
Possible explanations include oil spilled during service, or leakage from a filter, drain plug, cap, housing or unrelated component. Record the timing, check the level according to the manual and contact the service provider. Do not assume harmless residue or a service mistake without an inspection.
Is an oil leak expensive to fix on a pickup?
Cost depends on the actual source, access labor, engine and chassis. Some service-related fixes are modest; major seal or line repairs can require significant work. Get a written diagnosis, labor estimate, parts list and post-repair test before comparing quotes. Online averages without a model and location may be misleading.
Can a valve-cover gasket leak look like an oil-pan leak?
Yes. Fluid from a higher gasket can run down the engine and collect at the lowest edge, while airflow and shields move it farther. Ask for evidence of the source, not just the location of the drip on the pavement.
Is a low-oil-pressure light the same as needing an oil change?
No. A low-pressure alert can indicate lubrication risk and requires the response in your owner’s manual, usually stopping safely and switching off the engine. An oil-life reminder calls for maintenance and does not prove low pressure. Do not restart a truck with a persistent low-pressure warning merely because the level appears adequate.
Should I keep adding oil and driving until the repair?
Not automatically. Adding the correct oil may address a low-level reading under the manual’s procedure, but cannot repair a leak or guarantee adequate running oil pressure. Significant leakage, a persistent oil-pressure warning, smoking oil or serious engine noise warrants stopping and professional assessment.
Does oil on a turbocharger mean the turbo is broken?
No. External fittings, oil lines, neighboring components and crankcase ventilation can cause residue around a turbocharged engine. The shop should identify fresh leakage and follow the relevant engine procedure before condemning the turbocharger.
Can an oil leak cause smoke without overheating?
Yes. Escaping engine oil can reach a hot surface and create smoke or a strong odor even when coolant temperature looks ordinary. Because of fire and injury risks, stop safely, shut down and seek inspection rather than trying to locate it beside a running, hot engine.
A final decision sequence
If you take just one approach from this guide, make it this: warning first, oil level second, confirmed source third, written estimate fourth, verified repair last. A photograph and a simple time log help a shop reproduce the situation. They do not replace an inspection, but they can prevent a vague “oil underneath” complaint turning into an unnecessarily expensive parts replacement.
Sources and editorial boundaries
The research below is based on owner instructions from Ford, consumer guidance from AAA, NAPA, Firestone and the FTC, an engine-specific Detroit Diesel service bulletin hosted by NHTSA, and the EPA’s used-oil disposal information. Manufacturer documents are examples, not universal procedures for every truck. Links are included for readers who want to check the underlying guidance:
- Ford: Engine Oil - Checking the Engine Oil Level
- Ford: Engine Oil - Adding Engine Oil
- Ford: Low Engine Oil Pressure warning
- AAA: 13 Common Car Problems Explained
- NAPA: What to Do When You Discover an Oil Leak
- FTC: Auto Repair Basics
- Detroit Diesel: Symptom Diagnostics - Oil Leaks
- Firestone: Why Is My Oil Light On?
- EPA: Managing, Reusing and Recycling Used Oil
These sources explain general diagnostic principles rather than identifying the fault in any particular vehicle. Illustrative costs are hypothetical, and an oil-leak diagnosis should be confirmed by inspection and appropriate tests.